9 Easy Ways to Improve the Lighting During Your Video Calls
When you’re setting up for an important video call, does your process include checking your lighting?
If you’ve ever been frustrated by unwanted shadows, low lighting, or silhouetting on your video feed, go through these tips to help you improve your lighting for video calls.
» FREE TRIAL: Get Started with LoopCV & Send Out 100s of Highly-Targeted Job Applications in <10 Minutes
1. Optimize Your Natural Light
When you’re choosing where to set up your video call, choose a spot that’s near a window. Natural lighting is not only important to look better on your video calls. It should also be part of your work from home self-care process, as it is essential to maintain the right circadian rhythm and boost your energy.
The ideal situation is to have your desk right in front of a window so the light can fall directly on your face.
Natural light is softer than artificial light. It’s also bright enough to avoid casting unwanted shadows on your face, but only if you’re facing it.
The problem with natural light is that you can’t control it. So you have to adapt to it.
Choose a window that gets consistent light at the time of your meeting. If the light is too strong, put up a semi-transparent curtain to reduce the intensity of the beams.
Don’t sit with your back facing a window. You’ll end up with a lot of shadows on your face. A window on only one side will also cause the same issue unless you can counteract the light with intense artificial light from the opposite side.
Use natural light to your advantage, as much as possible. When it's available, it’s the cheapest way to get great lighting in every video.
Don’t have good natural lighting? No problem! There’s a lot you can do with the lights already in your home, or there are affordable options to improve your lighting without breaking the bank.
2. Position Your Lights Well
The placement of your lights is just as important as the type of lights you have. You want to create balanced light on your face and upper body with minimal shadows. You do this by placing lights in strategic areas around you.
The most important light is the one that sits right in front of your face. If possible, sit a gentle light directly behind your camera, shining straight at you. If your light source is directed like a spotlight or flashlight, point it at your upper body, not your eyes.
A lamp works well for easy video chat lighting. If you have a simple table lamp, plug it in a few feet away from you behind your camera. Test it with the lampshade first. If it’s too dim, take the shade off and test again.
Avoid putting lights too far to one side unless you have multiple lights. A single light on the side will cast many shadows unless there’s another light on the opposite side to balance it out.
3. Choose the Right Bulbs
Every light bulb has a specific color type.
Warm light is usually a little dimmer and has a faint yellow hue. The warmer the light, the more yellow it is.
Cool light is brighter and has a blue tint. The cooler the light is, the bluer it appears.
The most natural-looking light is somewhere in the middle of the two. So on the light bulb light scale (running from 1000K to 10000K), you want a bulb that’s around 5000K.
This will look like bright afternoon sunlight, giving a nice balance of both warm and cool light that won’t interfere with the look of your video.
LED bulbs are better than incandescent or fluorescent bulbs, especially since you can often adjust the color as needed. Incandescent bulbs don’t usually give off the right shade of light, and they can generate a lot of heat. Fluorescent bulbs usually have harsh light that’s visibly unnatural, although modern fluorescent bulbs are better than the older tube models.
A new light bulb for your lamp or overhead light does a lot to improve your video. Having a natural-looking light means you won’t be washed out or discolored on screen.
4. Reduce Reflections Around You
Reflective surfaces in your background can ruin whatever good lighting you have in your favor. Light flares from reflective surfaces are distracting and may make your camera work too hard to adjust to random lighting conditions.
Set up all your lighting and turn on your camera for a test run before your video meeting starts.
Look for reflections or awkward lighting spots that distract from your video. Change things up until you have a reflection-free background.
If you can’t move the reflective surface itself for whatever reason, try to redirect your light or move it to a position where the reflection is not visible on the screen.
5. Set Up 3-Point Lighting
Three-point lighting is the cornerstone of good video and photography.
The basic idea is to set up 3 different lights around you to provide the perfect balance of light and eliminate shadows.
Each light has its own role. It can either be the key light, the fill light, or the backlight.
Key Light
The key light is the primary light that sits in front of you, behind the camera. This light is meant to illuminate your face. It should be the brightest light of the 3.
The key light should be slightly off-center for an ideal effect, creating some shadows. But, don’t worry, the fill light will smooth this over!
Fill Light
This is a secondary light that supports the key light. It should be placed on the opposite side from the key light, at the same angle. It should be dimmer than the key light and should fill in many of the shadows cast by it.
If you don’t have another decent light, you can use a reflective surface. As long as it has enough light bouncing back onto you, it should work just as well.
Backlight
The backlight sits out of the sightline behind you. It’s off at an angle and directed at your head. This light creates a halo effect around your head that gives some perspective to make you stand out from the background.
Backlights aren’t 100% necessary, but they add an extra dimension to your videos that looks really well on-screen.
Three-point lighting requires you to have at least 3 good-quality light sources. If you only have 2, you can emulate the key light and fill light, skipping the backlight.
If you don’t have the lights you need to make this work, you can also look into getting a few cheap lights to make your video better.
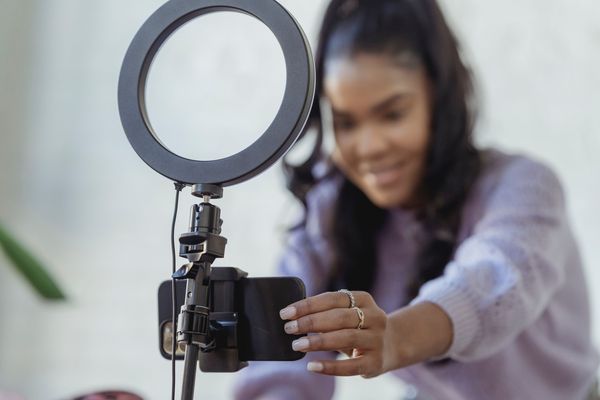
6. Get a Ring Light
One of the simplest ways to improve your lighting if you don’t have a lot of good options at home is to buy a ring light.
A ring light is a single light made up of small LED bulbs put together in a circle. These are soft lights that illuminate your face well without casting too much harsh light. Because they’re in a circular pattern, you also get even lighting across your face without a lot of shadowing.
Ring lights are used alongside whatever existing light you have in the room. This could be your normal overhead lights, a window, or whatever else you usually use to light up the room.
7. Diffuse the Light
Harsh light is the enemy of good video. A bright, direct light will wash you out and make you look pale. However, if your best light sources are a little too bright, you can fix that by diffusing the light.
Diffusion means taking a direct beam of light and passing it through a semi-transparent surface. The result is a softer light that’s scattered and doesn’t cast a lot of shadows on your face.
It may sound complex, but it’s way easier than it sounds!
You can diffuse light at home using anything from a shower curtain to a piece of parchment paper. Whatever you’re using needs to be semi-transparent so that enough light can get through to you.
Keep the diffuser at least 2 feet away from the light source. This is going to help with safety. If the diffuser is too close, it might heat up from the light and catch on fire.
As long as your diffuser is far enough away from your light source, it should work well and be perfectly safe.
You can also use diffusion on harsh natural light if the sun is shining directly on your face through the window.
8. Remove Harsh Backlighting
Backlighting is part of 3-point lighting, but not all backlighting is good. You want to avoid bright lights behind you that will either create a distracting light or make you into a silhouette.
If there are any lights behind you, turn them off, move them, or block them off.
Try to avoid sitting with a window behind you, unless you can close the blinds or curtains.
If you want a light in the background to make it more interesting and add depth to your video screen, diffuse the light or use dimmer bulbs. Try a lamp with an opaque shade, string lights, or another soft background light that won’t overpower your main lighting.
9. Use a Filter
When you’ve done everything you can physically, there’s still one more trick that can help you out. Today, many video call software comes with built-in light correction filters.
These filters aren’t a perfect solution, but they can take a lousy lighting situation and make it much less noticeable. Or, you can make your lighting better with all the above tips, then boost your video quality even more using a filter on your call videos to enhance the visual appeal.
Most light filters work best when you have low light conditions. You can brighten the screen without ruining the video quality. However, when using filters, make sure that you know how to use them properly! Zoom has so many options that sometimes it may be easy to get confused and switch on the wrong filter. We’ve all seen work from home memes of conference calls gone wrong!
So, yes, filters are a good solution if there are no other options because they are free and relatively effective, but make sure to choose the right one.
» FREE TRIAL: Get Started with LoopCV & Send Out 100s of Highly-Targeted Job Applications in <10 Minutes
Conclusion
Good lighting can significantly improve your video calls. You’ll be easier to see, look more professional, and you can interact with body language instead of just words.
Before your next video call, take some time to come up with a good way to light your call space, even if that means ordering a few extra lights to fill in the gaps.
About the Contributor
Veselin Mladenov is the Content Manager of ThriveMyWay. He has more than 10 years of experience in the field of corporate marketing and sales, and decided to pursue his passion - digital marketing and content creation.
LinkedIn: Veselin Mladenov
Twitter: @VeselinMladeno6